


Super díky 😊🥳
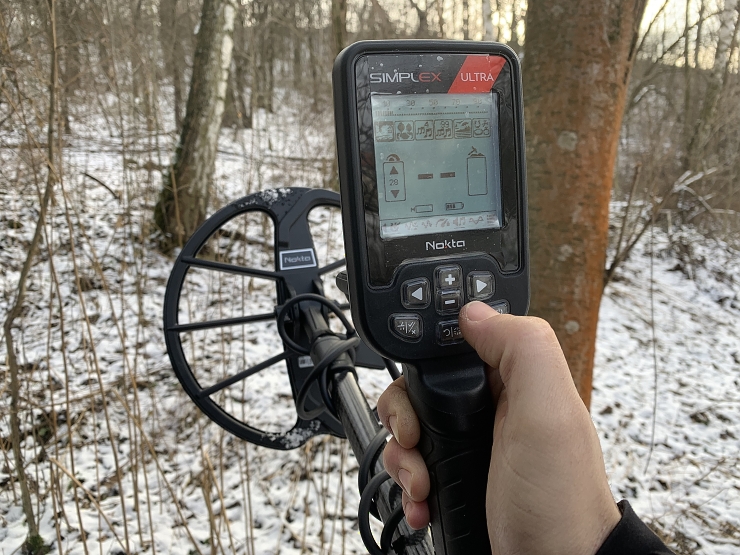
How to set up the Nokta Simplex Ultra metal detector by Jaccob
Categories: Detektor kovů Nokta - Makro Simplex+
As most of you have probably noticed, the popular Nokta simplex detector has been completely modernized and a new series of detectors Lite, BT and Ultra has been created. The significant shift in the new series is mainly in the design, performance and programming of the detector.
The new series is noticeably lighter, the waterproofness has increased from 3m to 5m and the operating frequency from 12kHz to 15kHz.
But the really big leap is in the detector software, especially in the Ultra model. The original name Simplex was based on the word SIMPLE, but the setting options of the new series, especially the ULTRA model, are noticeably richer and correspond to detectors from higher price classes. But now to the setup itself..
Compared to the original Simplex, there are some major settings, especially the recovery speed, ground stabilizer and complete audio settings. I will try to summarize my findings so far in a few points.
Coin/Relic ID range
There are also two ID ranges (coin/relic) available on the Ultra model. I would recommend everyone to choose which ID range suits you best from the beginning and then use that one. Each of the ranges has a different range of IDs and you would then receive different IDs for the same target, which could then be confusing for you.
For a classic search, the range I have found most useful is the coin range, which has a finer scale for non-ferrous targets, nothingHowever, a warrior or iron artifact hunter might find the ID range for artifacts useful, which again has an expanded range for iron.
Ground Damping Filter
A new and quite interesting feature that allows to cut off the weaker so-called flicker signals and thus makes the detector's response more contrasting. Primarily the function is used to attenuate the response from the ground, however adding a filter value does result in a slight reduction in range, but at the same time the detector becomes more stable so that higher sensitivity values can be used.
The combination of higher settings (e.g. 5) with a high sensitivity value is interesting. This can also achieve that the detector is completely quiet even at maximum sensitivity and the response to the target is clearer. This effect can then be used positively, especially in poorer soil conditions and in areas with a high concentration of targets and debris.
Depth ID evaluation
In general with all detectors, the accuracy of the evaluation decreases with increasing depth and poorer soil conditions. Logically, the weaker the signal from the target and the more it is affected by the response from the ground, the worse the data the detector will get for the ID calculation.
In this setting, it is therefore possible to specify the limit at which the detector should still attempt to display the ID value. There are a total of 3 options to choose from L (low-low), M (medium-medium) and H (high-high).
In the H setting, the detector will try to evaluate more or less any signal, even the weakest signal, even at the cost of considerable ID inaccuracy. In the L setting, the detector will only evaluate the stronger signal, where it is expected that the evaluation will still be very accurate. Of course, the detector will also respond to deeper and weaker signals, but the response will be acoustic without evaluation, so this setting does not affect the depth of detection, only the depth to which the detector tries to output the ID number on the display. The value of M logically lies between these values.
Anyway, in general, I would recommend the M value on most, but if you are in soils with moderate mineralization, you can use a high setting (H), but the boundary signals may no longer be 100% correctly evaluated.
Recovery rate
There is also a new option to set the recovery rate, which works the same as the other detectors. In general, by increasing the value the detector gains better separation properties, but loses slightly in range and the audio signal is also sharper. Decreasing the value has the inverse effect, the detector has better depth range and the audio signal has a slower rise and decay. Personally, I have found a value of 2 to be most useful in the woods and 3-4 in the field depending on the number of targets.
Audio settings
Here again, it has made significant changes and you can set absolutely anything you can think of. So in the audio menu you can assign the desired pitch, custom volume and ID range for each of the tones.
The only logical exception is the multitone (99 tones). In total the detector has 6 modes, where depending on the selected mode there is 1,2,3,4 or 99 tone audio.

Recommended LES setting:
- Mode: Field - This 2-tone mode is the deepest mode in the detector and is more suitable for cleaner locations such as most domestic forests.
- Recovery Speed: 2 - will further enhance the detector's depth range.
- ID range.
- Ground attenuation filter : (0-3) depending on location, the less the better.
- Sensitivity : 25-29 depending on location and interference.
- Iron tone: on
- Depth of ID evaluation : M - in places with lower mineralization you can try H.
Recommended POLE settings:
- Mode: Park; 4 or 99 tones - the modes behave very similarly, I recommend choosing the mode based on the number of tones you want.
- Recovery speed: 3-4 depending on the concentration of targets.
- ID range.
- Ground Damping Filter: 2-5 depending on location, the less the better.
- Sensitivity: 24-27 depending on location and interference.
- Iron tone: on
- ID evaluation depth : M


The article is included in categories:

 mám od ledna simplex lite a chystám se ženě poříďit ultra a hned Jí tu Noktičku ukradnu